
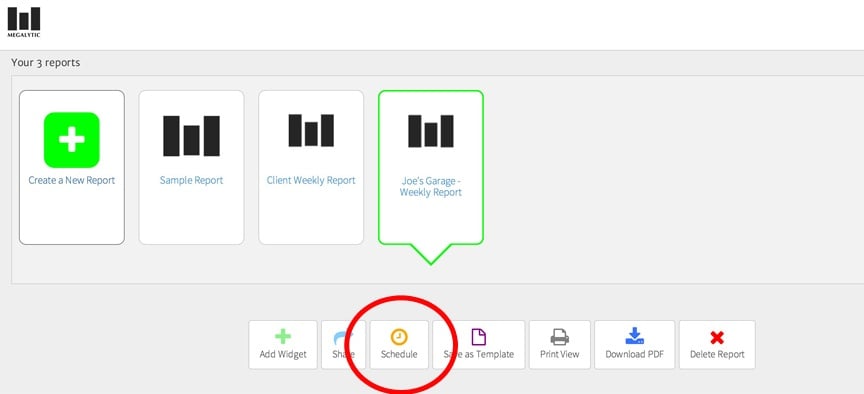
You can schedule reports to be delivered to an audience on a regular basis (e.g., monthly, weekly). The image below shows a report named “Joe’s Garage – Weekly Report” that I want to send to the client each Monday. I select this report, and click on the “Schedule” button in the control panel.
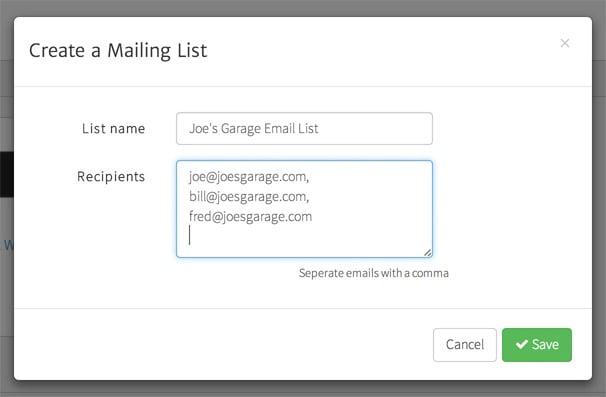
This brings up the scheduling window where I can specify the email addresses of people who should receive the report, as well as how frequently the report should be delivered. Click on the “Edit” icon, as shown below, to create an email list for this report.

This brings up the “Create a Mailing List” window. Give the list for this report a name, and enter the email addresses of the people who should receive the report.
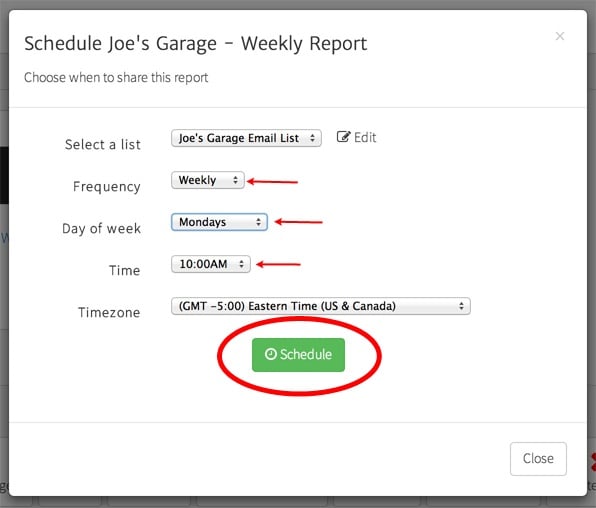
Save the list, and enter the rest of the scheduling information. As shown below, I’ve set up the schedule to deliver this report at 10:00am every Monday morning. Click the “Schedule” button to finish the process.
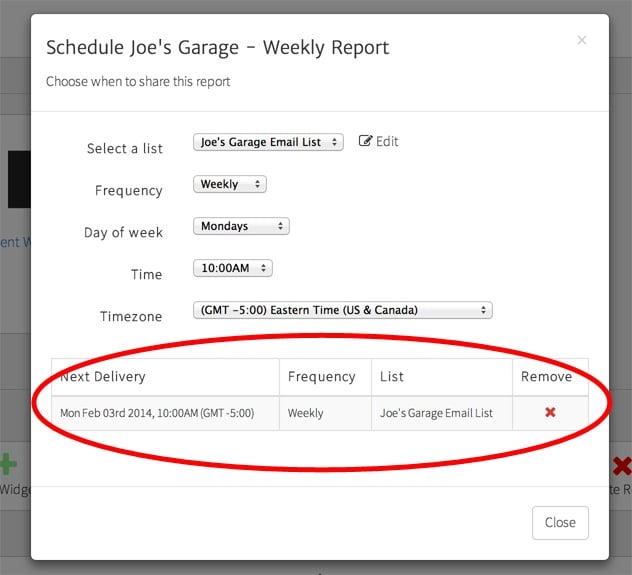
You will now see the next scheduled delivery at the bottom of this window. If you made a mistake, you can click the red X in the “Remove” column to delete the scheduled delivery. Assuming everything is OK, click on “Close” and you are done.
When the window closes, you will see on the control panel that the report you just scheduled has a little clock icon appearing on it. This indicates that the report has an active schedule set up. To edit the schedule (or remove it), simply select the report and click on the schedule button at the bottom of the control panel.