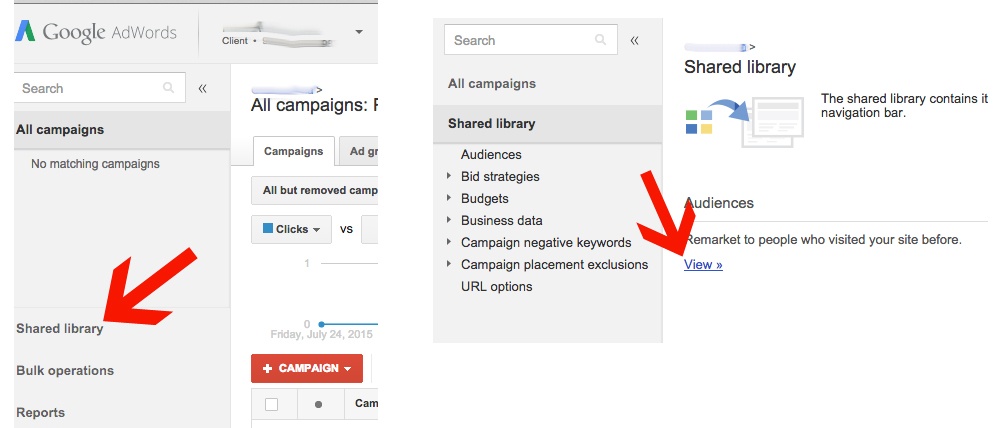
First, go to the Shared Library from the bottom of the left-hand column within Google AdWords. Once there, choose to View Audiences.
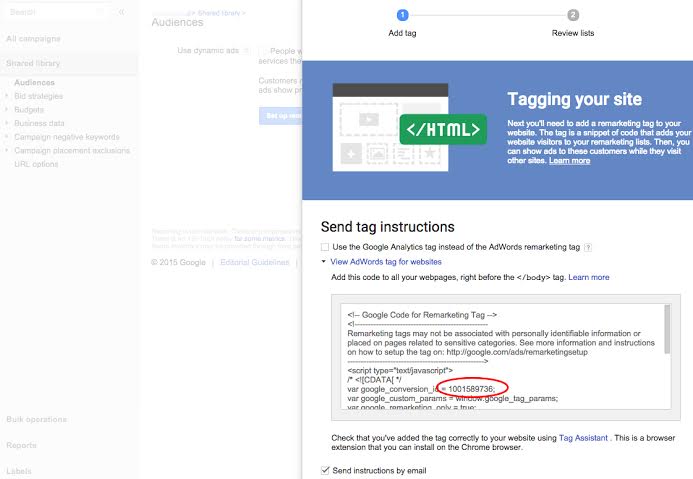
If you haven’t yet set up a remarketing code, you’ll see a screen prompting you to start the process. Click the “Set up remarketing” button to get the code snippet for your site.
This snippet should be placed on every page of your site, immediately before the closing </body> tag. If you have the knowledge and access to do so, you can insert this code directly into your site yourself. If you don’t, then you should ask whoever is responsible for updating your website.
Note, that if you are running Google Analytics on your website, and have linked your Google Analytics account with your AdWords account, then you can also create remarketing lists from Google Analytics, without needing to include this code snippet on your site. For details, see: Remarketing with Google Analytics.
If you do want to add it yourself, note that you can make the process much simpler by using Google Tag Manager (assuming the Tag Manager code has been placed on your site), which allows you to deploy multiple tags onto your site without having to actually edit code.
Within the Tag Manager interface, add a new tag. Select AdWords and choose AdWords Remarketing for Tag Type. Next, copy the Conversion ID from the code snippet (circled in the previous screenshot) and paste it into the respective field within Tag Manager.
Finally, choose to fire the tag on All Pages, save, and publish live to your site. If you need to brush up on your knowledge of Tag Manager, see Google’s helpful support section.
You should now see a default “All visitors” list showing up in the Audiences section of AdWords. Depending on the volume of traffic to your site, you should also see a count of collected individuals appearing within a day, as long as the code has been installed properly.
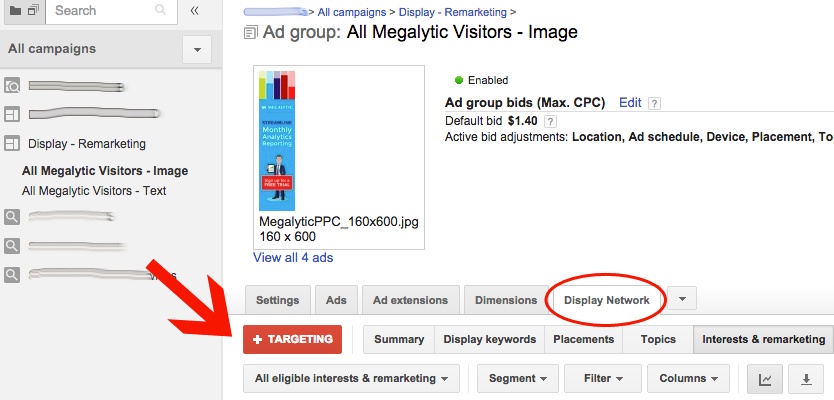
Now, you can apply this remarketing list to begin targeting users with ads. Back in the Campaigns screen of AdWords, select the campaign and ad group you’d like to use for remarketing (note that remarketing lists are always set up at the ad group level). Go to the Display Network tab and select the red “+ Targeting” button.
Here, you’ll see a list of categories to target. Select “Interests & Remarketing” and choose “Remarketing Lists” from the dropdown. This will allow you to select a remarketing list to add to your ad group.
Once you save your selection, you’ll be targeting ads to people collected on this remarketing list. However, you may soon realize you want to target more specifically than reaching everyone on your site, or that you want to define a different timeframe for targeting than the default 30 days. Using the tag that’s already on your site, you can create new lists based on newly-defined criteria.
Let’s say you sell clothing online. You want to be able to show ads to people based on the category of clothing they view. For example, if someone looks at dress shirts, you want to show that person an ad for dress shirts, which will perform more effectively than a generic ad for your brand or an ad for shoes.
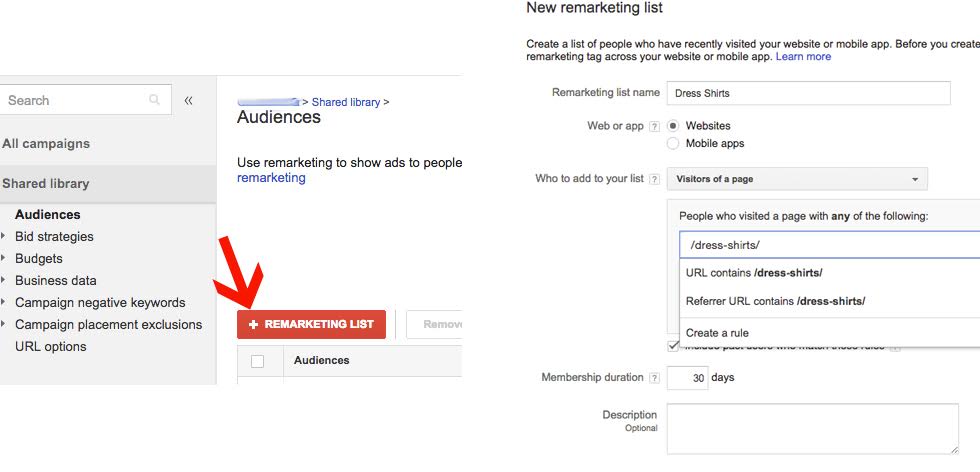
To set up custom remarketing lists, return to the Audiences section of AdWords where we set up the initial tag. Click the red “+ Remarketing List” to begin defining a new list.
Here, you can use a number of criteria to choose your audience, including:
For this list, we want to target anyone who has viewed dress shirts on the site, so we set it up to reach people who visited any URL containing /dress-shirts/. Of course, depending on your site’s URL structure, you’ll have to determine the best way to define your desired audience.
Next, you can define how many days people stay in your list. To determine a length of time to include people, consider several factors:
You can also add a description to remind yourself, and others who may touch the campaign, of the list’s targeting parameters and purpose. Save it, and you can now apply it to ad groups using the previously shown technique.
Using custom defined lists, you can exclude people you don’t want to see ads, a technique overlooked by many brands. For example, by excluding people who have reached a “Thank You” page, you can avoid showing ads to those who have already purchased or contacted you. That way, your existing customers won’t become annoyed by seeing your ads after they’ve already converted.
Remarketing offers a powerful solution to increase revenue from people who visited your site but weren’t quite ready to buy from you or contact you. Using Google AdWords, you can get a remarketing campaign running through a fairly simple setup process.
Beyond the setup stage, start thinking about ways to segment your audience to target specific remarketing ads to the most relevant people. You’ll soon begin to see results you can use to measure success and inform future bidding and targeting strategies.