Before we get started, I should mention that, if you prefer to watch a video than read through the post, the folks who do Google Analytics training at webucator have created this video that takes you through the steps.
https://www.youtube.com/watch?v=kiTP9MC8uLI
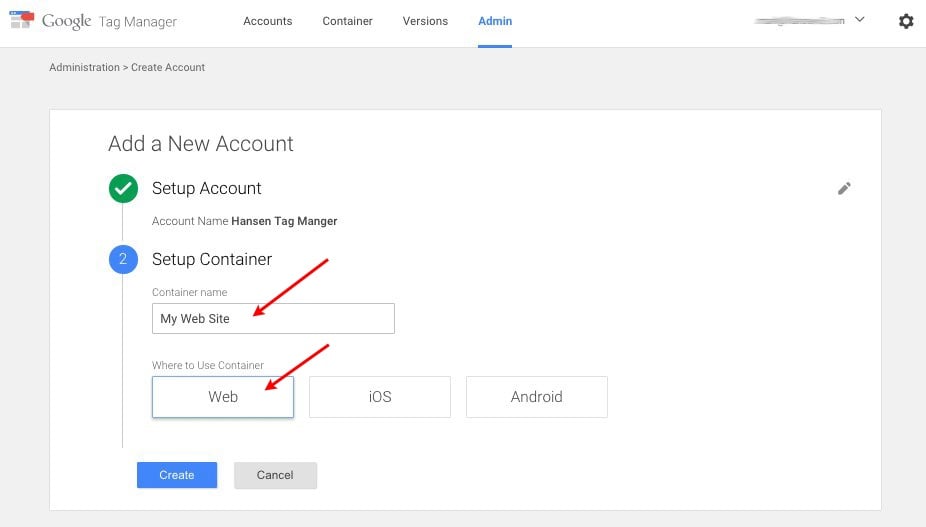
If you haven’t done so already, create a Google Tag Manager account.
During this process you will create a container, where you will store all the tags for your WordPress website. Use the name of your website as the name of this container (You may have other containers in the future for other websites). Choose “Web” for “Where to Use Container”.
If you already have a Google Tag Manager account, you may need to create a new container for your WordPress site. In that case, simply navigate to the Admin section, and from the Container selector, pick “Create Container …”.
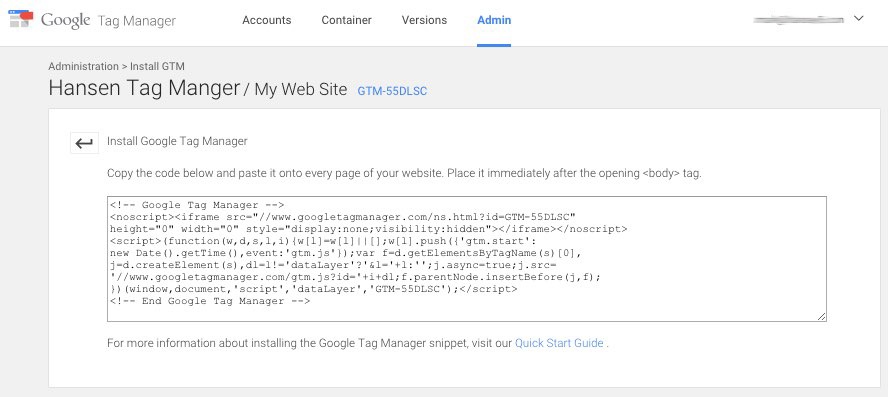
Once your container is set up, open it and click on the Admin tab to enter the administration area for your container. Click on the gear symbol next to “Install Google Tag Manager”.
This will bring up a code snippet that you are going to cut and paste into WordPress.
To install Google Tag Manager, you are going to copy and paste that code snippet into WordPress. Specifically, you are going to paste it into the correct file in the WordPress Theme that your website is using.
Note that if you are using a 3rd party theme (e.g., a theme that you purchased), in order to preserve compatibility with future upgrades, you may not want to edit your theme directly. In this case you should
modify your theme using a child theme. In either case, the process of pasting in the code snipped is similar.
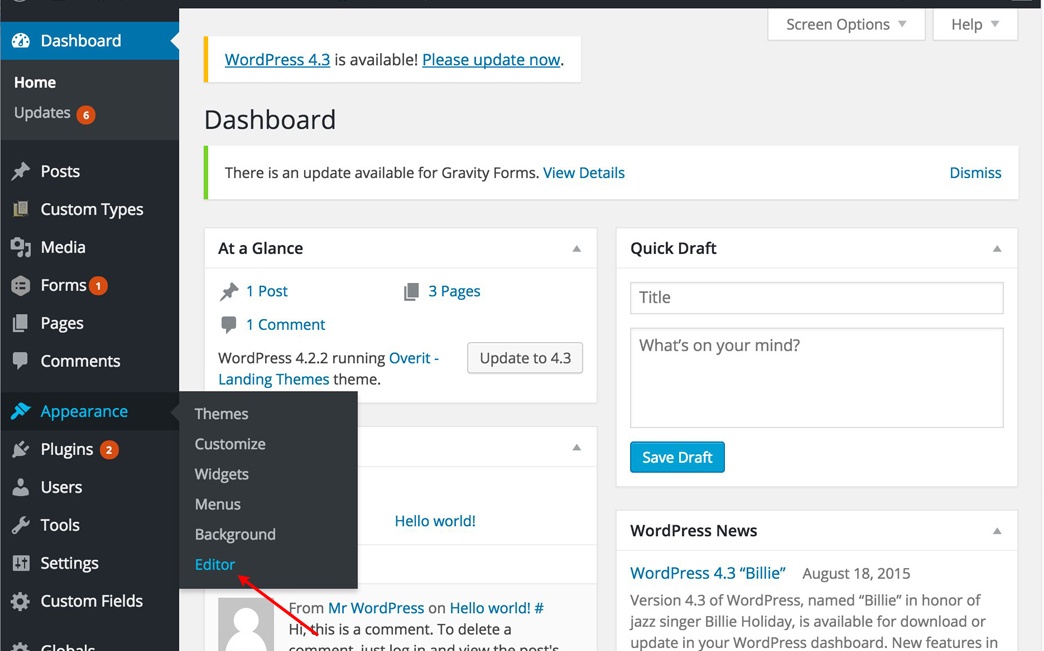
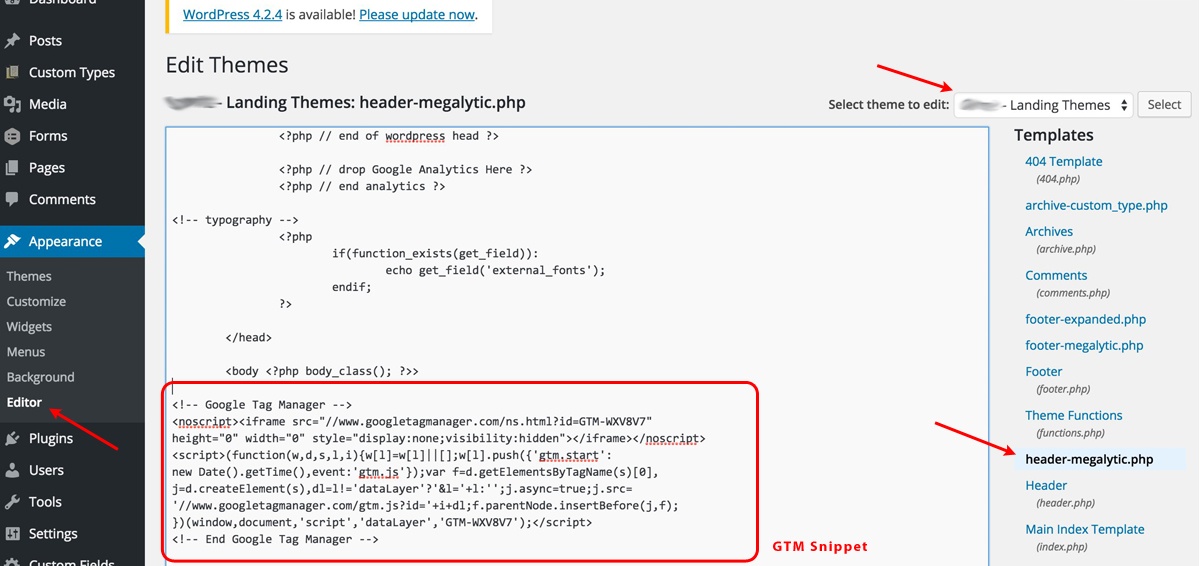
To get started, log in to WordPress and navigate to Appearance > Editor.
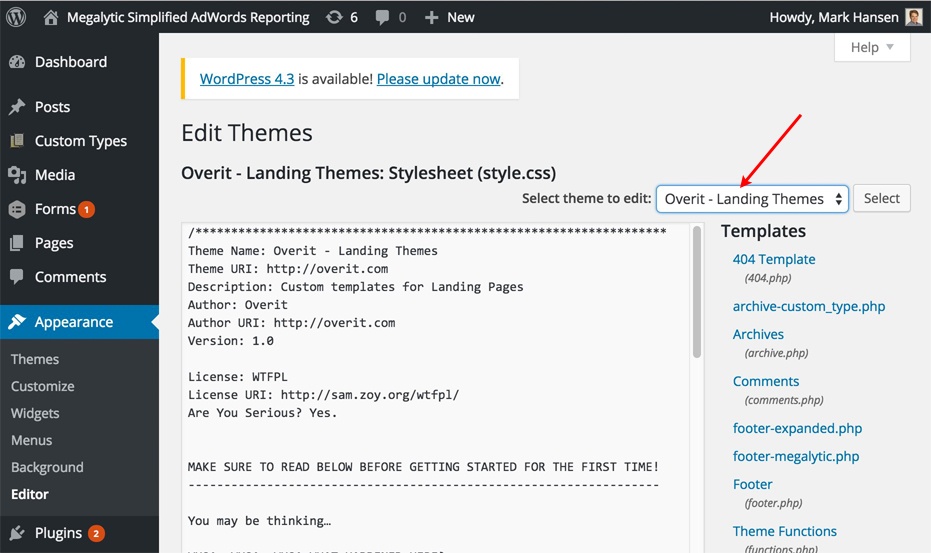
In the upper right corner, where it says “Select theme to edit”, make sure you have selected the active theme for your website.
If you are not sure which theme is active, click on “Themes” in the left hand navigation bar, and see which of the installed Themes is highlighted.
Next, in the right-hand column, under Templates, click on the appropriate header file. By default, this will be “Header” (header.php). However, the theme may be using a different file, depending on how the developers have customized it. In this case, our site is using a file named “header-megalytic.php”. If you are not sure which file is your active header file, then check with your developer or use trial-and-error, testing as you go (testing process described below).
Assuming your active header file is header.php, click on this link in the right side column. The text editor in the center of the page now contains the header.php file. Scroll down until you find the opening <body> tag. Then, paste in the GTM code snippet right below that tag.
Once you’ve inserted the snippet, make sure you scroll to the bottom of the page and click on the “Update File” button to save your changes.
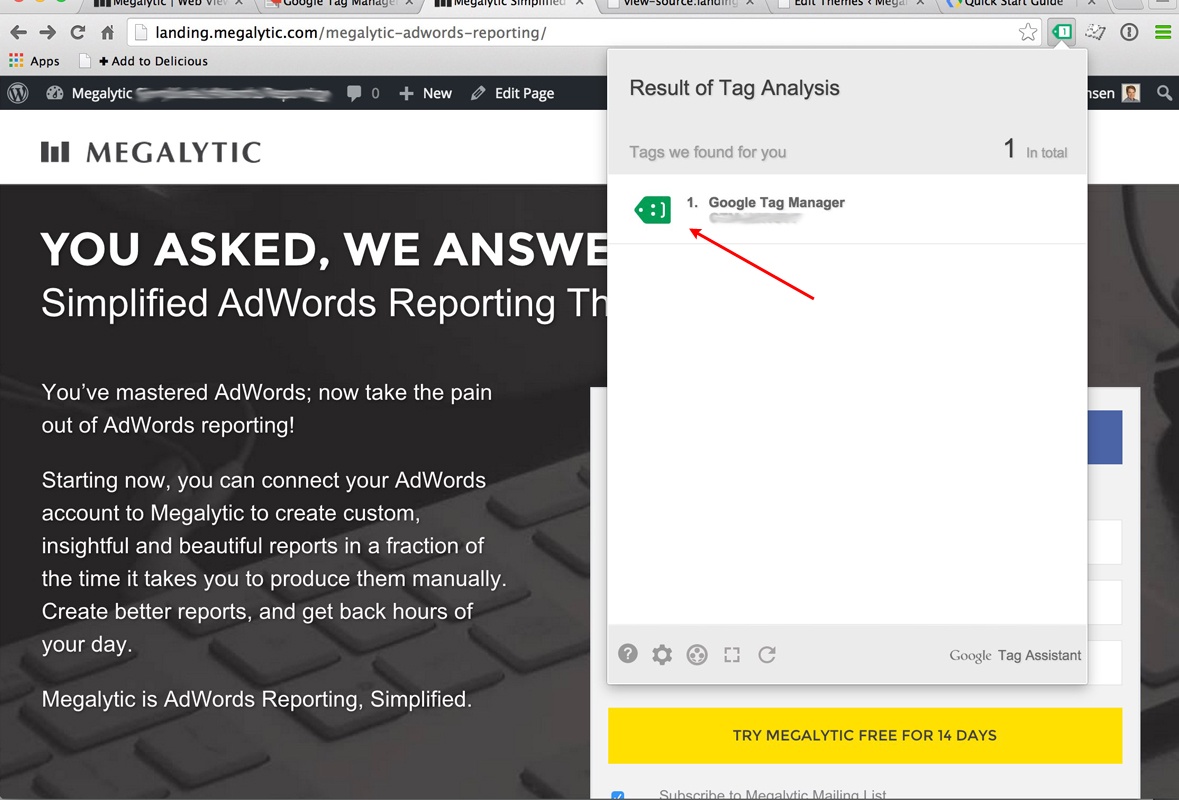
Next, we are going to use Tag Assistant (by Google) to make sure that Google Tag Manager is installed correctly. For this, you will need to use the Google Chrome Browser. So, if you don’t have Chrome, install it on your computer now.
Open the Chrome browser, and install Tag Assistant. Once Tag Assistant is installed, simply navigate to a page on your site, and click on the tag icon at the top of your browser. You should see a green smily-face tag labeled “Google Tag Manager”, indicating that GTM has been successfully installed.
Check some other pages of your website as well. You should see that Google Tag Manager is installed on every page. If it is not, you may have to check with your developers to see if there is more than one header file where you need to paste the code snippet.
Now that you have Google Tag Manager installed, you can use it for installing all kinds of tracking tags like Google Analytics, Google AdWords, AdRoll, CrazyEgg, and more. To learn more about working with Google Tag Manager, check out Google’s Quick Start Guide